When I was a child we made paper chains for the Christmas Tree. They were fun, very colorful and a holiday event each year.
Many years ago I was desperate for some type of activity to use in the classroom. I was tired of worksheets, the kids were tired, and we were both bored. It is difficult to remember the specific content I was trying to practice, but someone offered me a paper chain activity they had used. The other teacher was not that enthusiastic but when he gave it to me said: “you can probably do something with it”. I did. And very successfully.
Paper Chains for Academic Content
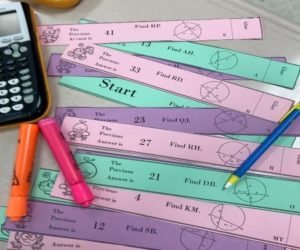
If you are not familiar with paper chains—either the Christmas type or the Classroom type—here’s the scoop. This is like doing a worksheet with each problem on a separate strip. You begin with the strip marked “Start”, solve the problem and then look for the answer on another strip. Once you have laid them all out in order, you attach them.

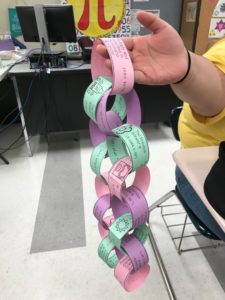
Beginning with the start, you make a loop and fasten. Each strip after that is linked through the previous strip until you read the end.
The first time I used it in class, the kids were at first confused (they never made paper chains before) so I had to explain how to put them in order and fasten together.
The students were in pairs and worked together to lay all the strips out before they fastened them. It was required that they show all their work to receive credit. I think the first time took the entire period and several students had to take the pieces home to finish because they just could not complete the entire chain.

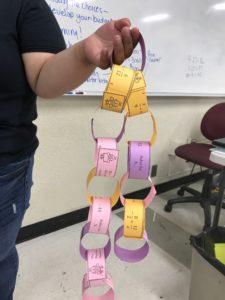
But the next day, the students asked if they could do another paper chain. They found it fun. I had copied the pages on colored paper, so the result was colorful. They enjoyed working with other people and since they were creating a chain (about three feet long), most of them stood up at some point to finish.
I learned several things from this activity.
Tips for Using Paper Chains
- Math is more fun when you are doing it on colored paper. I make a point of using color paper to print the most boring things, even quizzes. If I use a variety of colors, students will ask for a specific color so I am careful to have pinks and purples. But then I think everything is more fun on colored paper.
- You can still use worksheets as long as you disguise them as something else. If it looks like a worksheet, even before students take a close look, they are disappointed. They decide to be bored before they even begin. So I use a worksheet as a game, a scavenger hunt, a round robin, etc.
Something other than a typical worksheet. Or students are given a choice of how many problems they do. On a worksheet with 20 problems, students can pick their favorite 10 problems. This is an excellent way to differentiate for students. Some students will naturally try the more difficult problems, some will gravitate toward the easier. Either way, they all work.
My first year as a teacher, I handed out a worksheet that someone had given me. It has 30 problems on it and when I handed it out, students began complaining. So I told them to do 20 problems and they were excited. Then I experimented. A few weeks later, I had a review sheet with 40 problems on it. Students were horrified until I told them they had to do 20 only. They cheered.
- Kids enjoy doing math as long as they are physically doing something. Being able to stand up and move around as they are working relieves stress. It also helps they are manually putting something together. And they are talking with a partner as they do it.
- Students need step by step instructions when doing anything the first time. I have gotten better with instructions over the years, but at times I still have to remind myself to go simple. Introduce small steps slowly, pause and repeat often. Walk around and check as students are working and head off mistakes early.
- If you are doing an activity or project that creates something, students need to see a finished product. It helps to show students what they are creating. Otherwise, they get stuck.


Additional Strategies for Using Paper Chains
I have used paper chains for a variety of concepts, all successfully. But over the years, I have found that there are some strategies that work better.
—I usually do all the cutting myself. It takes me 30 minutes to cut enough sets for all my classes. I find the cutting relaxing and it saves time. Students take the entire period to cut. I have several students with OCD and they cannot stop cutting on the line because it is never straight enough.
—Students need to show all their work for each problem. This is important and I require it for students to get credit for the activity. Since they are working in partners, I tell students that they each are responsible for completing the work, and keep an eye that one partner does not do the work while the other sits.
—Students should put the strips in order before they begin. This allows me to check to see if they are in the correct order. If chains are wrong they have to be taken apart due to errors. Despite this, some students will just go ahead and put it together first. I think they want to be the “first” to finish. And so sometimes, students will need to take them apart and fix.
—While students can stand up and move about, they cannot “visit” another pair to tell them the order. No motioning across the room, no hand signals. Having the students turn in the work with the chain cuts down on cheating, but students are creative.
—Taping or Stapling is a better option than glue. Originally I used a glue stick, but glue does not dry fast enough in some cases, and too fast in others. It is also more difficult to take apart when a mistake happens.
Paper Chain Resources
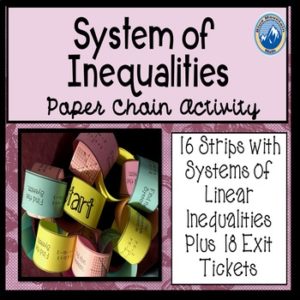
If you are looking for resources for the classroom, I have a variety that I have used in the classroom. Check these out and try a paper chain soon. Your students will love it!


Leave a Reply