In a previous blog post, I shared some ideas for working with google drive. If you missed it, the link is here. This week the focus is on Google Forms. Forms has been one of my go-to tools. I use them as Warm Ups, Exit Tickets, activities of all types, reviews and assessments.

Headers
If you want to personalize your forms, then change the header. Forms has a variety of headers or you can upload your own. If you change the header, the theme of the form will change as well so it is color coordinated.

If you want to create your own, the size is 1600 pixels wide by 400 pixels tall. You can make them in any design program (Canva, PowerPoint, etc). You can also buy them from various stores.
If you want some templates, there is a link at the bottom to download some Canva templates. Canva is a design program, there is a free version which is fine for these template. You can then change the titles and colors to suit your own taste.
Settings
When you click on the gear at the top of the form, you can adjust the settings for the form. The most critical settings are the Limit to One Response in the general settings area.
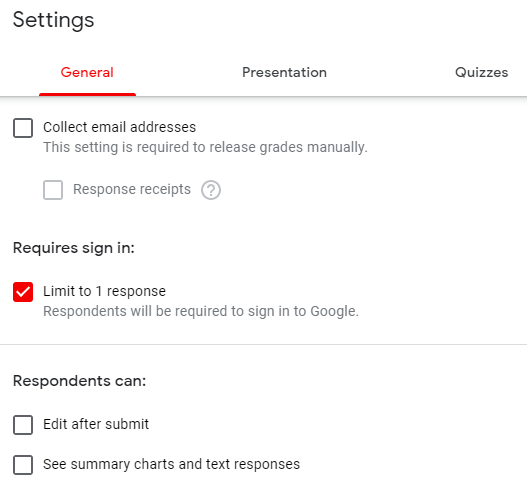
In the Presentation portion, keep in mind that shuffling the question order in this screen will shuffle ALL the questions. Which means if your first two questions are name and class period, they will appear at the end, middle, etc. instead of the beginning so you can sort the answers.
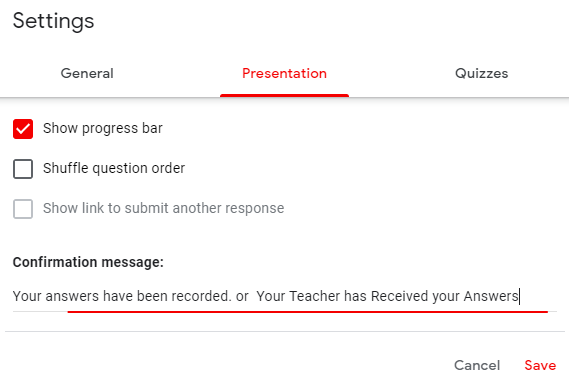
If this is scored and auto grading, you will need to specify it as a quiz to enable those features. Then you can decide how and when to release the grades to students. If you turn on manual, the form will automatically collect email addresses. Even though I turn it off, save it, the next class period it starts up again.
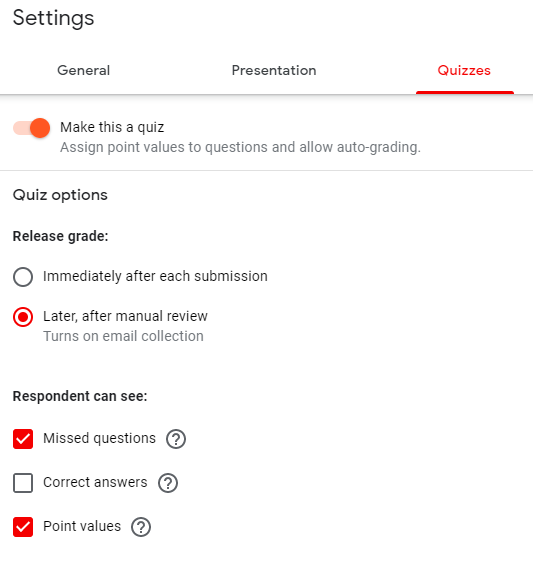
I also do not show the missed questions or correct answers. Depending on the question types, I may allow the points to be shown, but that is a choice I make depending on the use.
Using Sections in Google Forms
One way of using the sections in Google Forms is to organize the question types. Put all the multiple choice in one section, short answer in another, and end with an essay questions. Another way is to group the content together. If you are teaching trigonometry, ask students to write ratios first as in opposite/hypotenuse, then write ratios for Sin, then find the missing sides, find the missing angles, and finally solve a right triangle.
When the content is in separate sections, it is easier to identify the area where students need more help.
Feedback
You can add feedback to students for both correct and incorrect answers to questions. You are not limited to text, you can add a link or a YouTube video for students. This is helpful when students have forgotten some skill. You can add a link to a quick review video in the form.

Questions
The first question needs to be a students name. Last name is the best, another question for first name followed by the class period. This information is useful for sorting the google sheet of answers. You can then sort by period or last name when entering grades.
Question Types
There are several types of questions. I use multiple choice most often, followed by short answer/Paragraph. The limit on short answer is a few sentences. If students are going to write an essay use paragraph. These types of questions are self-explanatory.
The lesser known types are the Checkboxes, Multiple Choice Grid, Dropdown, Linear Scale. Checkbox grid and file upload.
Checkboxes
The curriculum my school is using this year likes to ask questions that have more than one correct answer. If you use “multiple choice” as a question option you are limited to ONE correct answer. But with Checkboxes you can have multiple correct answer.
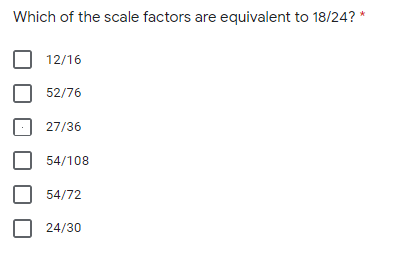
Tip: When I use this type of question, I make the point value equal to the number of correct answers. And I hide the point value in the settings. Otherwise, students will know (or suspect) that there are 3 correct answers to the question. If the students do not get all of the answers correct, then get zero points.
Multiple Choice Grid
This is an option when you want to order or rank items. You have one question per row and students can answer each row as a separate questions. Great use is for a survey.
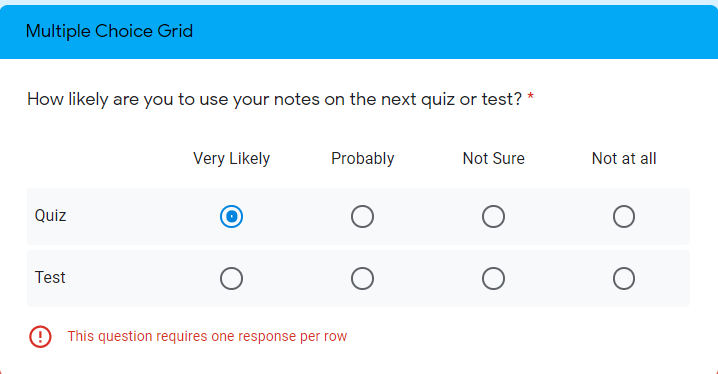
This question is set to one response per row. If you have multiple rows you can also shuffle the rows to get a more accurate survey. Students are limited to one answer per row.
Dropdown
This is another way of making a multiple choice question. You enter the answers and they appear on the question as “choose”. Once you click on choose, all the answers are available. You simply select one answer. This saves space on the form.
Linear Scale
This selection lets students select a number. One good use is to get an idea how students are feeling either before or after a test. Or check in with students after a break to see if they are ok.

Checkbox grid
Similar to the Multiple Choice Grid, but students are allowed more than one response.
File Upload
I have used this during virtually teaching on a regular basis. It is invaluable for uploading images of student work. But it could be used as a link for anything. Students could prepare projects, upload to their google drive and provide a link. Students can also provide links to audio or video explaining a math problem.

You can specify the type of file, or accept any file a student submits.

In uploading student work, I had to specify images only. When students were working in Geogebra, instead of screenshots they were submitting Geogebra files which could not be viewed. Tip: If you specify that it is a required question and students are not able to upload something, the entire form will not be able to be submitted. For this question, I may leave the required button off.
Response Validation
This is an option for questions types of Short answer, Paragraph, or Checkboxes. Enter your answer and then click the 3 dots at the bottom for “Response Validation”. You can specify exactly the answer students should submit and students
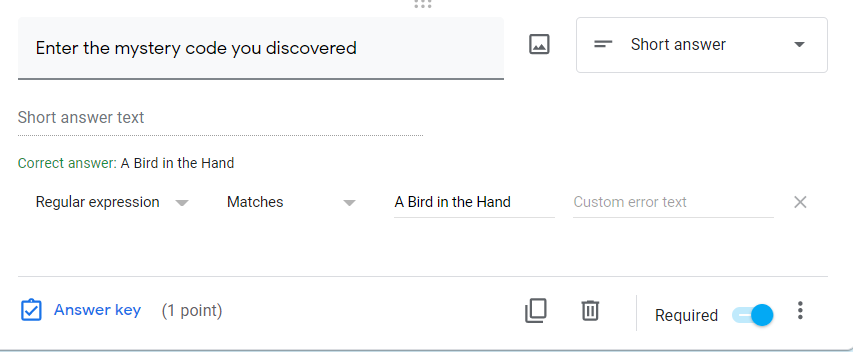
But this can be a source of frustration for students. This is an option for certain types of activities, like escape rooms or mystery words where a code or word is entered. You may need to specify exactly the format, such as all capitals, 1 space between each word. If the phrase doesn’t match, the students cannot submit the form.

So use sparingly, and perhaps turn off the required lock so students do not give up.
Logic Branching
There are several ways to use the logic branching in Google Forms. Logic branching means to go to a different part of the form based on the answer of the questions. For instance, if you ask a question on one step equations and the answer is incorrect, you may send the student to a link for reviewing solving equations.
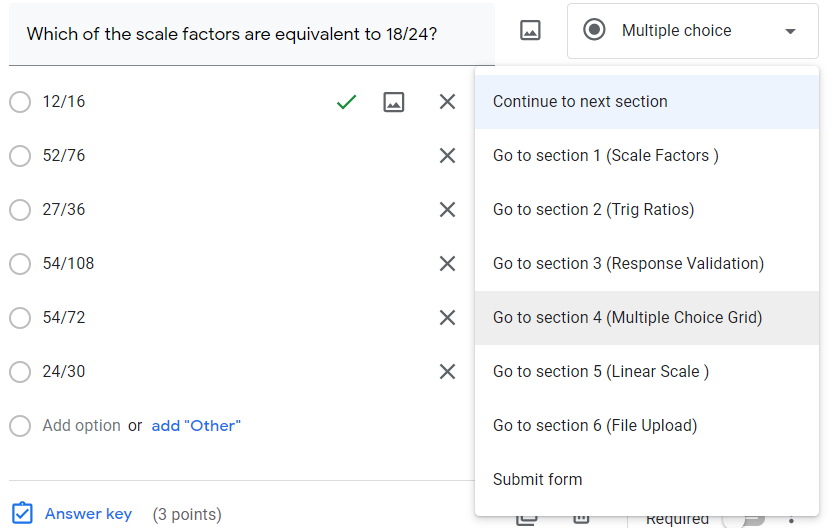
By clicking the 3 dots at the bottom of the question, you can specify if you want this option. “Go to section based on answer”.
You can ask a series of questions on prior knowledge. If students miss one question, then send them to the section on that skill, otherwise they need to skip the section.
Accommodating Students
Often students are given extra time in class and when they are taking a quiz or test, they run out of time. If the assessment is in Google Forms, you may need to adjust the settings so a student can continue working the next day.
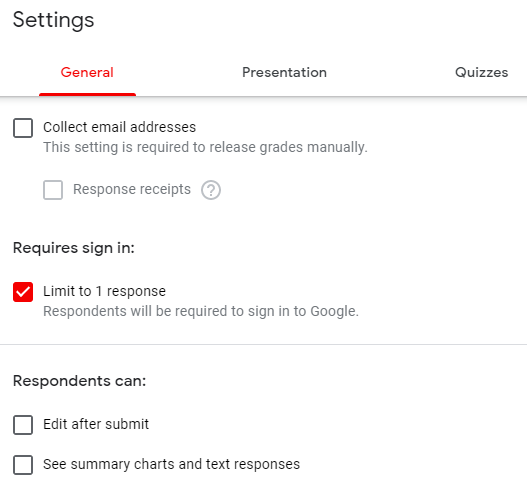
In the settings, I normally have all tests and quizzes limited to 1 response and they cannot edit after submitting. This prevents students from logging back in after class and changing their answers.
However if you have a students who is allowed to work with a paraprofessional to complete a test or quiz, you can take the “limit” off so they can log back in the next day to finish. You will also need to allow editing after submitting, and change all the answers so that none are required.
Just remind the student (and aide) that they must submit their work after each session or they will lose their work.
Adding Questions from other Google Forms
You can also import questions from different Google Forms. I like this option when reviewing for a test at the end of a unit. You can look at all the Forms you have in your drive and import questions from all of them and use to review.

Click the icon below the + sign and look for all the google forms you have used. You can then import all the questions into one form and keep or delete individual questions. This is a time saver.
If you are interested in those Google Forms header templates that I teased you about in the beginning, here is the link. If you have not used Canva before, here is a helpful video on getting started.
Whew! That was a lot of information about Google Forms, but there is so much more that can be done. It is more than an assessment, it is also a teaching tool. I hope you got a few tips to add to your teacher toolbox. Let me know if you have any questions by commenting or emailing me at [email protected].


Leave a Reply